So, you just got a newsletter sponsorship request on the Paved Marketplace. Congrats!
Wondering what to do now? There are a few things you can do to make the experience as smooth as possible for you, your readers, and your sponsor.
In this guide, we’ll walk you through the sponsorship process from start to finish so you can ace your ad.
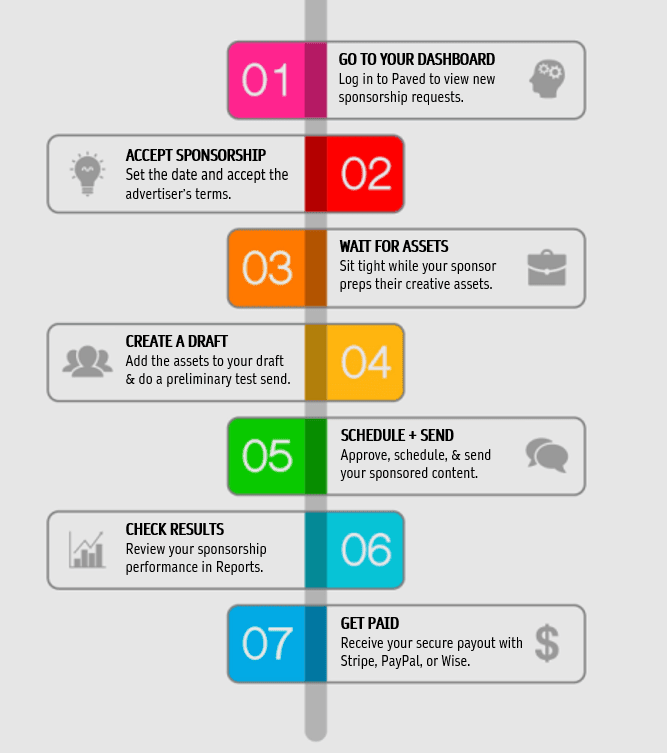
7 steps for a high-performing newsletter sponsorship
From accepting the sponsorship to scheduling your newsletter, here’s how the process works in Paved:
1. Go to your dashboard
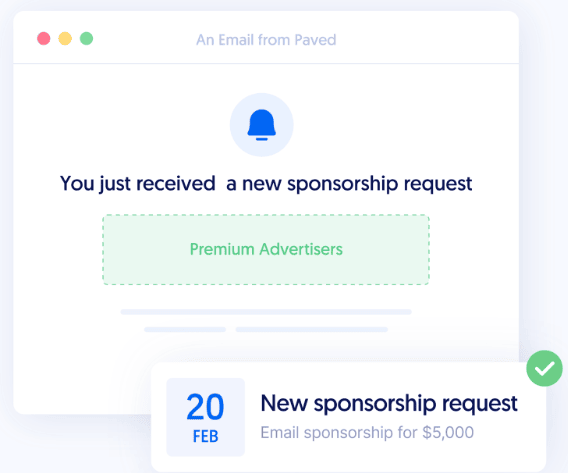
As a member of the Paved Marketplace, we’ll let you know ASAP when a sponsor wants to work with you. You’ll be notified via email and on your Sponsorships Dashboard.
The Sponsorships Dashboard is your home base for managing sponsorships, from chatting with advertisers to finalizing your newsletter ad.
To view your dashboard:
- Log into your Paved publisher account.
- Click the dropdown next to your name and choose Sponsorships.
Here, you can browse requested, pending, and sent campaigns.
2. Accept the sponsorship
To accept a pending sponsorship request:
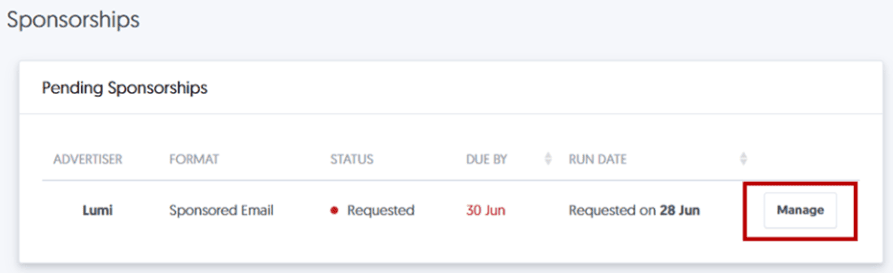
- On your Sponsorships Dashboard, click the Manage button to view a pending request.
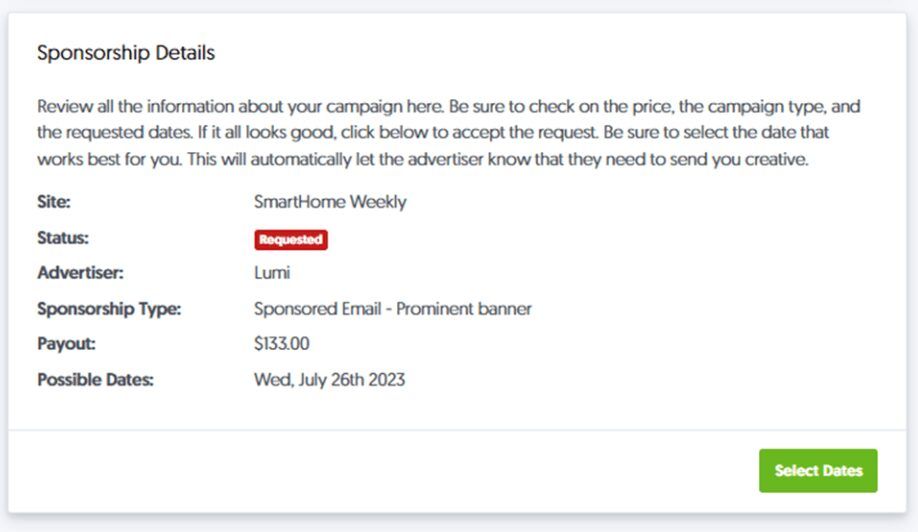
- Review the sponsorship details, including price, campaign type, and requested dates.
- To accept a sponsorship, click the Select Dates button.
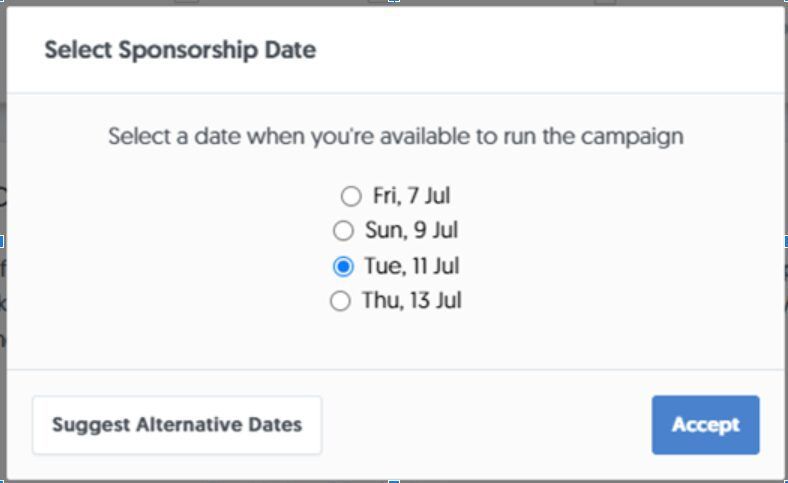
- Use the radio buttons to choose the sponsorship date and click Accept.
- Note:
If these dates don’t work for you, use the Suggest Alternative Dates button to propose an alternate.
All set! Accepting the sponsorship will automatically let the advertiser know that they need to send you creative. In the advertising business, “creative” refers to the visual and textual elements of an advertisement, which is up next.
3. Wait for assets
After you accept the sponsorship, you’re officially in the creative phase of your campaign. This means it’s for the advertiser to upload the ad copy and images according to your requirements. While you’re waiting, stay tuned to your inbox for a notification about creative upload.
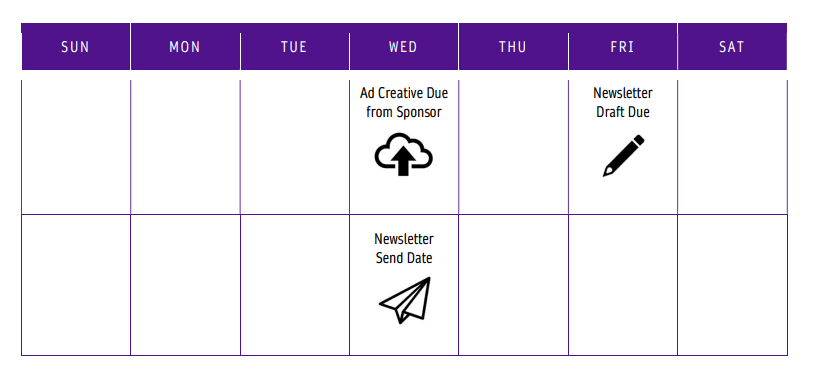
Advertisers must provide their creative assets to you 7 days before the newsletter's send date. If you’re running an ad in your September 30th newsletter, for instance, you’ll get assets by September 23rd at the latest. However, if you need the creative sooner, you should let the sponsor know in the chat.
4. Create a draft
After your advertiser uploads the creative assets to Paved, the wait is over. Now, the campaign goes into “Awaiting Draft” status. This means we're ready for you to:
A) download the assets,
B) add the assets to a draft version of your newsletter, and
C) send us a test email.
A) Download the assets
Time to take a look at the creative to make sure it’s a great match for your publication.
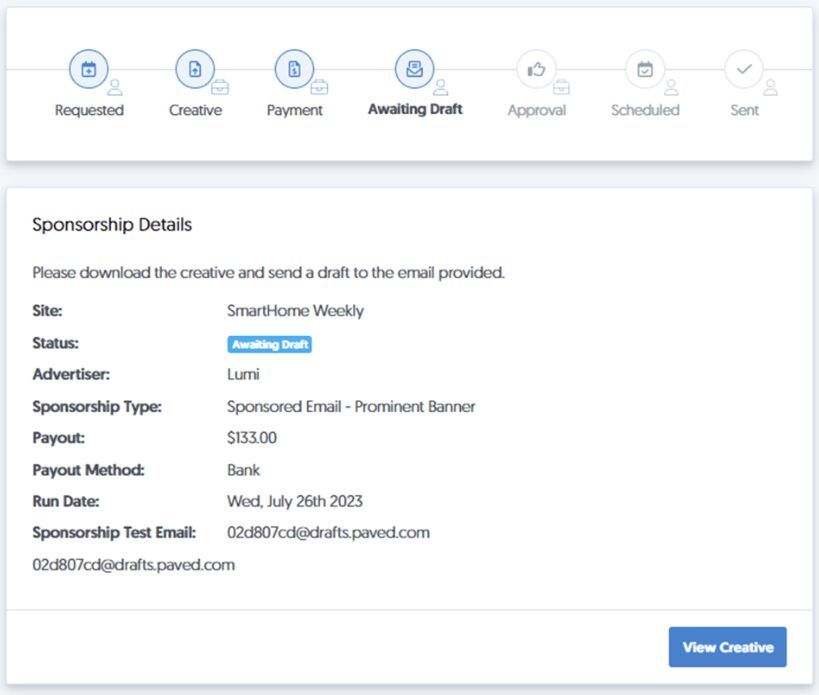
- On your Sponsorships Dashboard, click the Manage button next to the sponsorship you want to work with.
- In the Sponsorship Details section, click the View Creative button.
- Read the advertiser’s copy and click View to check out the ad image(s).
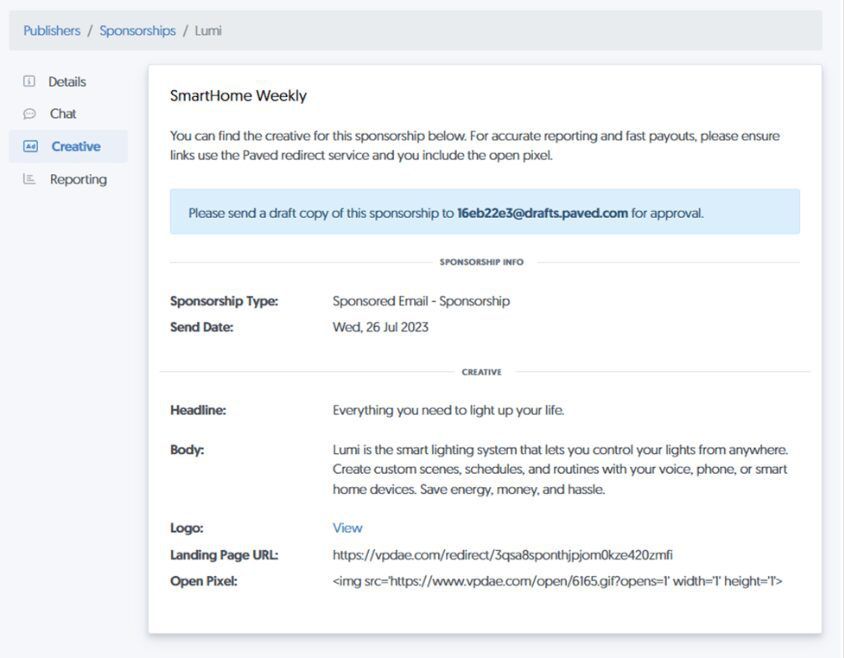
Check for typos and spelling errors and be sure to plug the copy into a tool like Grammarly. Beyond the basics, we highly recommend editing the content to fit your publication. When publishers edit ad copy to match the newsletter’s tone of voice, performance often improves.
After you get the creative assets, it’s time to build out a draft of your newsletter in your ESP (email service provider). Make sure to share the draft for approval by the deadline date, which is provided on your Sponsorships Dashboard.
B) Draft your newsletter
Next, it's time to open your ESP and create a draft email with all of the advertiser's assets, including:
- •ad copy
- •images
- •landing page URL
- •This is a special redirect link that starts with vpdae.com/redirect/#####...
- •the Paved open pixel
- •This is a small, invisible image that we use to help track the ad’s performance. Simply add a code block anywhere in the body of your draft and insert the pixel there. [Get Instructions]
- •Any other elements from the Creative page
- •Reminder: you can locate everything in Sponsorships Dashboard > Manage > View Creative).
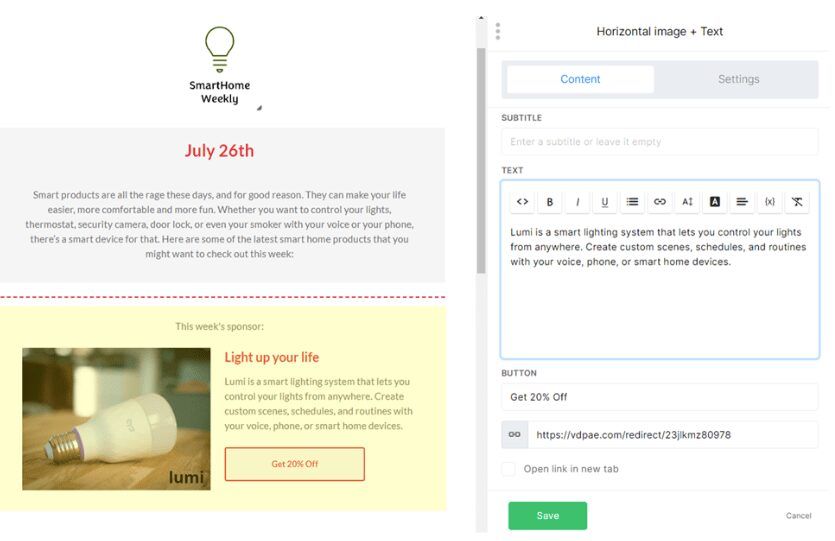
3) Submit your draft for approval
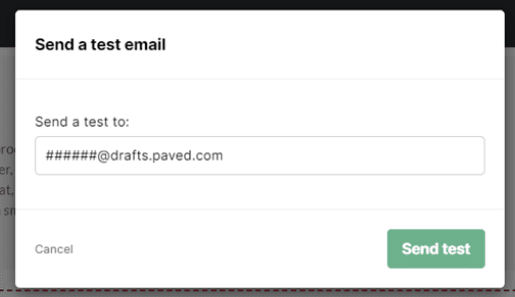
After you’ve saved the draft, it’s time to send a test email to the unique address provided in your Paved account.
We’ll double-check the draft for you and share it with the advertiser so they can approve it.
Tip:
Send your test draft directly from your email service provider (ESP), rather than using an attachment, image, or link.
After sending the draft, stay tuned to your inbox for additional feedback from the advertiser. They’ll either approve the draft or reject it and ask for another edited draft.
5. Schedule + send
Once the final draft is approved by the advertiser, the campaign will move to the Scheduled stage. This means everything is officially ready to go.
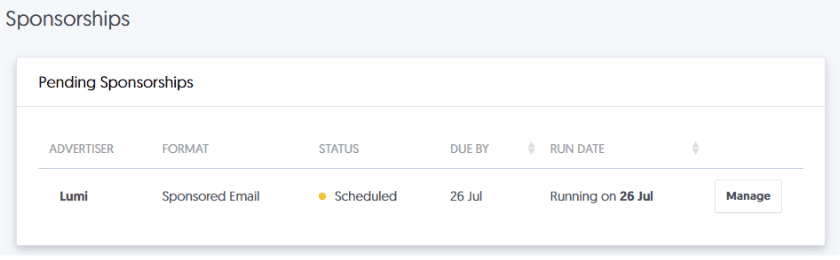
All you have to do now is send the sponsorship content on the run date!
6. Check the results
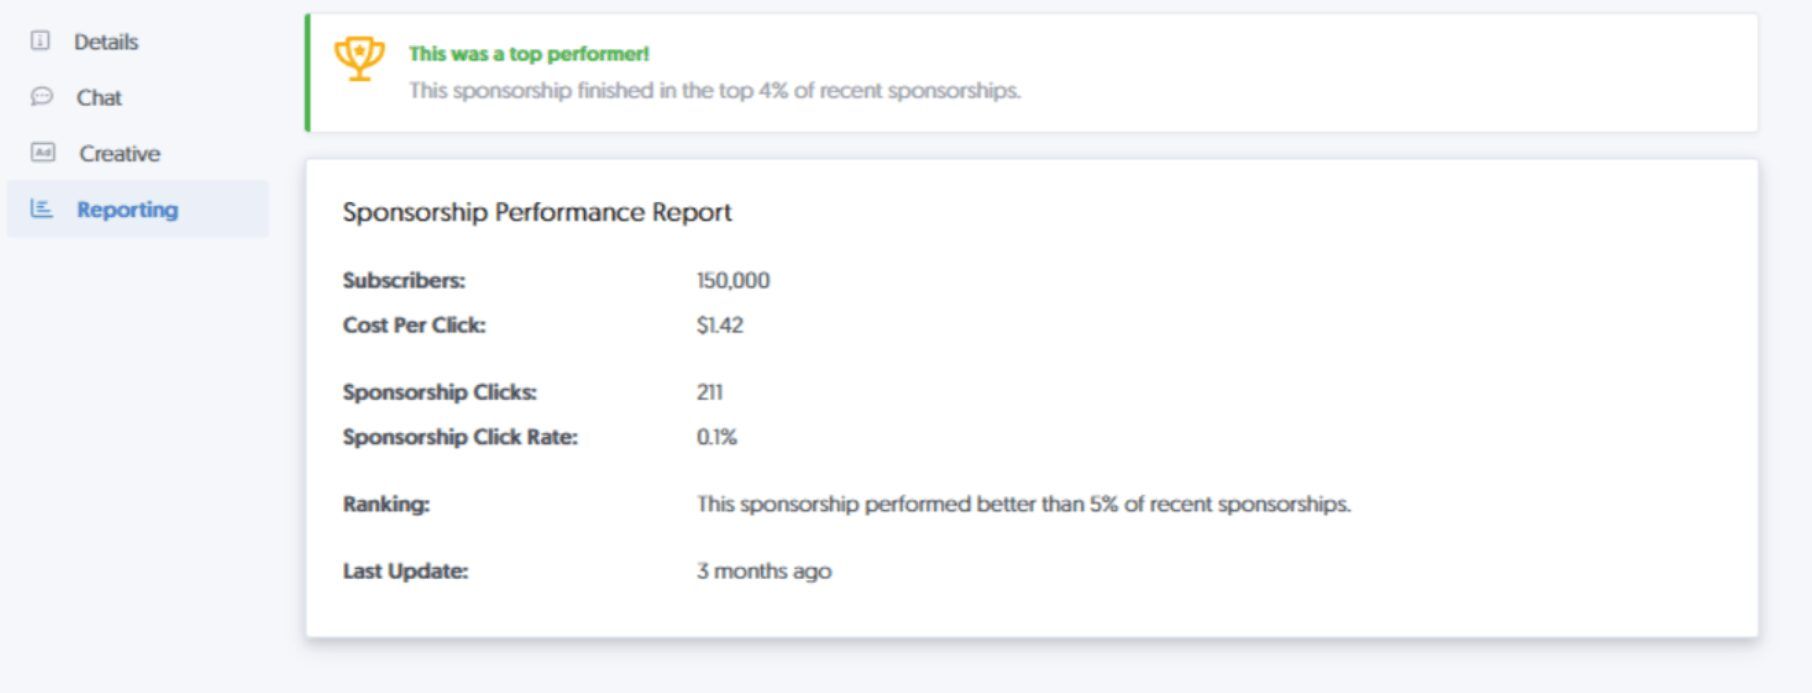
After you've completed the campaign, we'll collect performance data in your sponsorship report.
To view your reports:
- On your Sponsorships Dashboard, click Manage next to the sent campaign you want to work with.
- Click the Reporting tab.
- View the results to see how well your sponsorship performed.
Tip:
If performance is much lower than projected, consider offering the advertiser a makegood so you can still get a high review score. Learn more about the makegood process.
Now that you’re done with this sponsorship, don’t forget to ask your advertiser for a review in the chat. Reviews boost your profile and lead to more bookings.
Here’s a template you can use to ask for a review:
Hey [Sponsor First Name], thank you for your sponsorship of [Publication]! We are eager to know how your experience was. Feel free to leave a review at https://www.paved.com/advertiser/campaigns.
7. Get paid
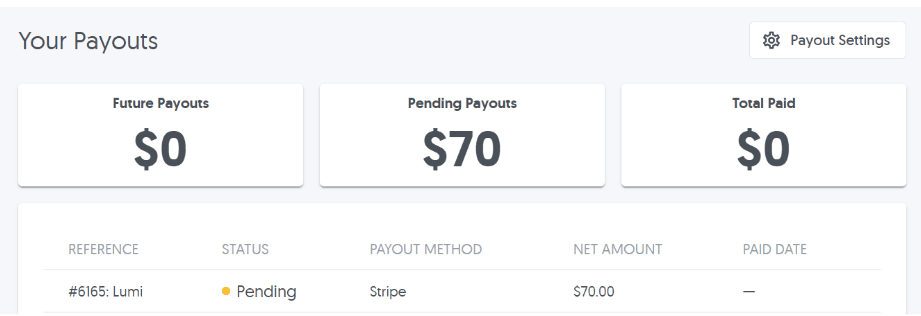
Be sure to update your payout preferences and view your balance in your account under Profile > Payouts > Payout Settings.
Want to win even more newsletter sponsorships?
The hardest part of monetizing your newsletter is getting your first sponsor. Now that you’ve done that, you’re well on your way to turning your newsletter into a viable revenue stream.
If a few campaigns perform well and get positive reviews, sponsorships will come more frequently, so you can consider raising prices and increasing revenue.
For more tips on winning repeat bookings and optimizing your sponsorship profile, visit the Paved blog: